When I headed out last week for my weekly grocery shopping trip, I knew that there was a forecast for snow AGAIN this weekend. Honestly, I am so sick of winter! But.....I did wake up on Friday morning and I HEARD BIRDS CHIRPING! A sure sign that we are heading in the right direction. Back to the impending snow.....so knowing that snow was coming, I anticipated being snuggled under my new quilt (A pinterest project and an entire post in itself!), a good book in hand and a crockpot of Vegetable Beef Soup simmering in the crockpot.
The snow arrived and it has been going off and on all day! So, the crockpot got drug out early this morning to start the Vegetable Beef soup before church.
This recipe was given to me by a friend and has become one of my family's favorites. I love that it is:
1) Easy!
2) Done in the crockpot so I can get it ready in the morning and forget about it all day.
3) It makes a huge batch, so there is always enough for leftovers or to share. We usually take over some to our neighbor lady, Sue. She just turned 90 and is just a delightful lady that we enjoy visiting with, sharp as a tack and loves sports! We knew she would be watching the NCAA tournament games and might enjoy something warm for dinner.
4) Healthy---Fresh vegetables, barley for fiber, it just speaks 'comfort'.
5) It gets a thumbs up from all 5 in my family!
VEGETABLE BEEF SOUP WITH BARLEY
2-3 lbs stew meat
Onion, diced
6 C waters
2 C tomato juice
8 oz tomato sauce
1 T salt
2 t. worchestershire sauce
1/4 t. chili powder
1 beef bullion cube
2 bay leaves
celery, diced
carrots, diced
potatoes, diced
1 cup cooked barley
1 can corn
1 can green beans
1 can peas
Cut any fat off of stew meat and cut into bite size pieces. Brown in skillet. When brown, pour meat and all pan drippings into crockpot. Add everything else to crockpot and mix well. Cook on low for 6-8 hours. With about 1 hour to go in cooking time, add cooked barley (just cook quick cooking barley in boiling water for 10-15 minutes. Don't add it uncooked or it will absorb all of the soup liquid.) Fish out bay leaves and add 1 can each of peas, corn, and green beans. Simmer one more hour.
That's it! It's yummy and packed full of veggies and tender bites of beef. Serve it with a crusty loaf of French bread or some buttermilk biscuits.
This is a super easy meal to whip up before work as well. Nothing makes you relax like walking in the door of your home after a long day at the office, and being greeted by the aroma of dinner waiting for you!! The work is done, you can enjoy a healthy meal with your family. A crockpot is a working mom's best friend many days!
Thick and hearty, this soup will bring your family to the table quickly!
Enjoy your time at the table with your loved ones,
Stacey
Sunday, March 24, 2013
Thursday, May 17, 2012
Chippy Dippy Bars
I'm still here! I aplogize for being MIA for the last month!!
I hope all you mommies had a wonderful Mother's Day! It was a beautiful day to top it off! Today's post is a tribute to my amazing mother, Judy. I want to be just like her when I grow up! :-)
Mom is the strongest woman I know, yet she radiates joy, kindness and gentleness. Her commitment of care to our entire family and my late father during his 20 some years of health battles, has been an incredible example of Christian love---in sickness and in health. She loves to laugh and always has a smile on her face. She taught me the importance and value of taking care of your family and that your faith is not what you do, it is who you are.
AND SHE ALSO HAS AN ENORMOUS SWEET TOOTH! So, in honor of mom, here is one of her favorite treats - CHIPPY DIPPY BARS!
Just a mix and bake recipe....here's the cast:
Easy Peasy people.....Mix one stick melted butter with 1 1/2 cups graham cracker crumbs. Press into a square baking pan. Sprinkle with 1 cup chocolate chips, 1 cup butterscotch chips, 1 cup coconut, 1 cup chopped pecans. Pour 1 can sweetened condensed milk over the top (you can use fat free here too!) Bake at 350 degrees for 25-30 minutes. Oh - My - Gravy! These are over the top yum. I think of my mom each time I bake them, so this is for you Mom!
They are oooey, they are gooey, they are rich, they will knock your socks off.
I hope I can be as good of a mom to my little ones.....
as she has been to me. Here are a few more pics for you to enjoy! I love you, Mom!
Enjoy~
Stacey
I hope all you mommies had a wonderful Mother's Day! It was a beautiful day to top it off! Today's post is a tribute to my amazing mother, Judy. I want to be just like her when I grow up! :-)
Mom is the strongest woman I know, yet she radiates joy, kindness and gentleness. Her commitment of care to our entire family and my late father during his 20 some years of health battles, has been an incredible example of Christian love---in sickness and in health. She loves to laugh and always has a smile on her face. She taught me the importance and value of taking care of your family and that your faith is not what you do, it is who you are.
AND SHE ALSO HAS AN ENORMOUS SWEET TOOTH! So, in honor of mom, here is one of her favorite treats - CHIPPY DIPPY BARS!
Just a mix and bake recipe....here's the cast:
Easy Peasy people.....Mix one stick melted butter with 1 1/2 cups graham cracker crumbs. Press into a square baking pan. Sprinkle with 1 cup chocolate chips, 1 cup butterscotch chips, 1 cup coconut, 1 cup chopped pecans. Pour 1 can sweetened condensed milk over the top (you can use fat free here too!) Bake at 350 degrees for 25-30 minutes. Oh - My - Gravy! These are over the top yum. I think of my mom each time I bake them, so this is for you Mom!
They are oooey, they are gooey, they are rich, they will knock your socks off.
I hope I can be as good of a mom to my little ones.....
as she has been to me. Here are a few more pics for you to enjoy! I love you, Mom!
Stacey
Monday, April 16, 2012
English Muffin Bread
I hope everyone had a wonderful weekend! When the weather is cool and rainy, not to mention the gale force winds we had over the weekend, I always get the urge to bake. Baking homemade bread is one of my favorite things to do, I find it very soothing and relaxing. I was craving some English muffin bread and this recipe is as simple as you can get for a yeast bread. I know, some of you are already nervous. But I encourage you---DO NOT BE AFRAID OF WORKING WITH YEAST! It will not harm you! Many home cooks have had such terrible experiences with yeast bread, either the yeast not activating, loaves that turn out like something you would landscape your yard with. That is the great thing with this recipe, it tells you what temperature to bring the liquid to---therefore, no risk of it being too cool (and not activating the yeast) or too hot (which would kill the yeast), either way giving you flat, dense loaves. And, with just the one 45 minute rising time, instead of two that most bread recipes require, you can pull English Muffin Bread together for dinner that same night. I used my Kitchen Aid mixer with the dough hook but if you don't have a big mixer, use a mixer for the first portion, then stir the second batch of the flour in with a spoon.
There is something about the texture of this bread that is so alluring. It is firm, yet moist and delicate. It also makes the absolute BEST toast! Good thing it makes two loaves---one will be gone the same day!
English Muffin Bread
(adapted from Better Homes and Gardens)
5 cups all purpose flour
2 packages of active dry yeast ( or 4 1/2 tsp if you use the jar of yeast)
2 cups milk
1/4 cup butter
2 T sugar
1 t salt
In a mixing bowl, combine 2 cups of flour and the yeast. In a saucepan heat and stir milk, butter, sugar and salt until warm (120 to 130 degrees) and until butter nearly melts. Add to flour mixture. Beat with an electric mixer on low speed for 30 seconds, scraping the sides of the bowl constantly. Beat on high speed 3 minutes. Mix in the rest of the flour. Do not knead this bread dough. Batter will be VERY stiff. Divide into 2 greased loaf pans. Cover and let rise in a warm place for 45 minutes. Bake in a 375 degree oven for about 35 minutes. Remove from the pan immediately.
Enjoy!
Stacey
There is something about the texture of this bread that is so alluring. It is firm, yet moist and delicate. It also makes the absolute BEST toast! Good thing it makes two loaves---one will be gone the same day!
English Muffin Bread
(adapted from Better Homes and Gardens)
5 cups all purpose flour
2 packages of active dry yeast ( or 4 1/2 tsp if you use the jar of yeast)
2 cups milk
1/4 cup butter
2 T sugar
1 t salt
In a mixing bowl, combine 2 cups of flour and the yeast. In a saucepan heat and stir milk, butter, sugar and salt until warm (120 to 130 degrees) and until butter nearly melts. Add to flour mixture. Beat with an electric mixer on low speed for 30 seconds, scraping the sides of the bowl constantly. Beat on high speed 3 minutes. Mix in the rest of the flour. Do not knead this bread dough. Batter will be VERY stiff. Divide into 2 greased loaf pans. Cover and let rise in a warm place for 45 minutes. Bake in a 375 degree oven for about 35 minutes. Remove from the pan immediately.
Enjoy!
Stacey
Monday, March 26, 2012
Buttermilk Brownies
As you know, I am a complete choco-holic, as they say. I love anything chocolate and enjoy making all different kinds of recipes using chocolate. I remember coming home from school as a kid, and being so excited when I smelled cookies or brownies as I walked thru the back door. This meant my awesome mom had done some baking for our after school snack. I love to surprise my kids with a special something after school, to me it shows them that I have been thinking of them during the day. It allows us time to sit at the kitchen island, talk about their day and laugh together.
Homemade brownies are so easy.....you always have the basic ingredients on hand! These brownies are their favorite! They are easy to mix up, and they knock those brownie mixes out of the park! Moist, cake like and melt in your mouth....these are the best.
Start by mixing your dry ingredients together....flour, sugar and salt.
Then combine water, oil and butter in a small saucepan...bring to a boil. Let cool just a bit and then add to the flour mixture.
Mix well. Add buttermilk and soda....mix thoroughly. I love this step as the batter looks swirly...
The buttermilk makes these brownies oh so moist and rich.
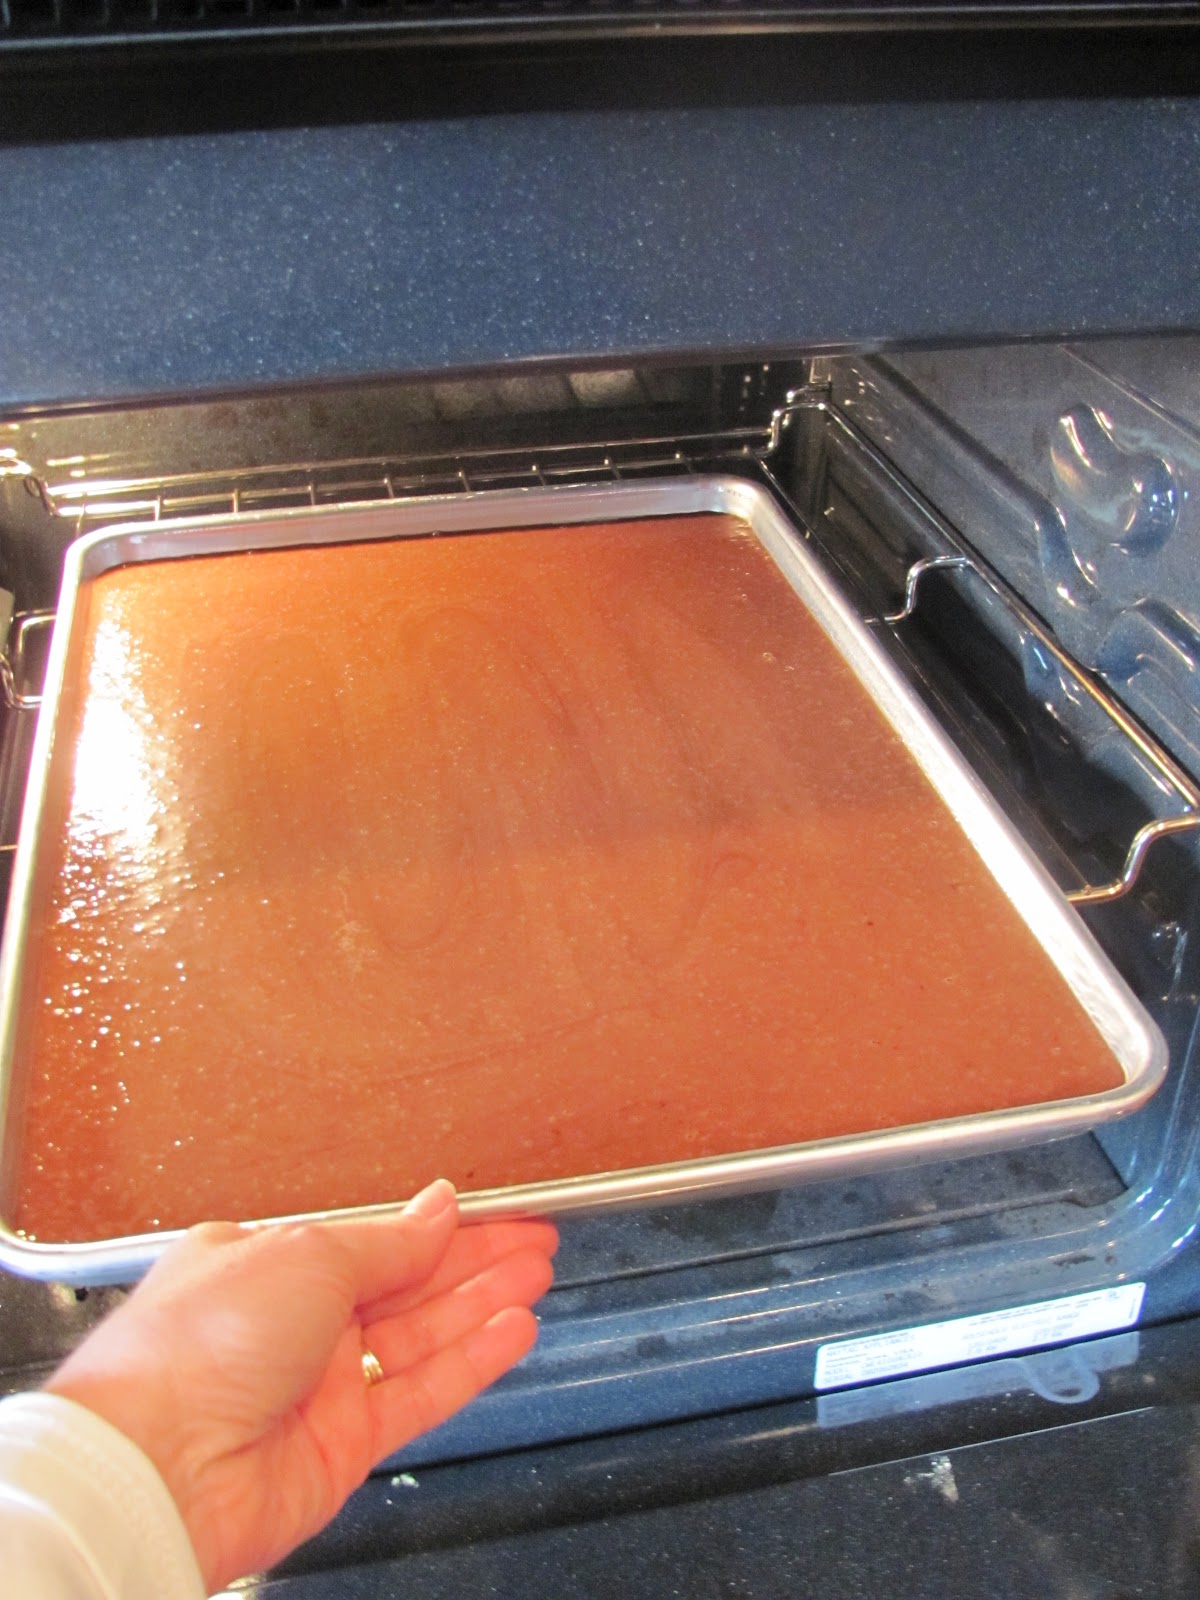
Pour your batter into a jelly roll pan, which is a large cookie sheet with sides.
This recipe comes with an incredible icing to add over the top, right as the brownies come out of the oven. Sometimes I ice them, sometimes I just sprinkle the top with powdered sugar. This cuts a bunch of calories and is a bit quicker. Today, I just sprinkled with powdered sugar.
oh man, are these good! And speaking of man....my husband just stopped home to grab some tax info and inhaled this one I had cut for the photo~! And, a warning....be careful when you eat them, if you choose the powdered sugar route. My dad always joked and called these suicide brownies....just don't INHALE when you go to take a bit or you choke to death! :-)
BUTTERMILK BROWNIES
2 c flour
2 c sugar
1/4 t salt
Whisk together.
1 c water
1/3 cup oil
1 stick butter
Bring to a boil and add to dry ingredients. Stir well.
Add 2 eggs
3 heaping Tablespoons cocoa
1 t vanilla
Mix well. Add 1/2 cup buttermilk and 1 t soda.
Stir until thoroughly combined. Bake 20 minutes at 350 or until set. Do not overbake. Frost immediately out of the oven with this icing.
Bring 1 stick butter, 3 T milk and 2 T cocoa to a boil. Remove from heat and add 1 t vanilla and 2-2 1/2 cups powdered sugar. Whisk well.
Pour over brownies and cool completely.
Seriously, these are the best brownies I've ever made and they make a huge pan...Great way to make a treat for your family, and then take some to a neighbor or new mom. Boot the box and go for scratch...your family will thank you!
Enjoy!
Stacey
Homemade brownies are so easy.....you always have the basic ingredients on hand! These brownies are their favorite! They are easy to mix up, and they knock those brownie mixes out of the park! Moist, cake like and melt in your mouth....these are the best.
Start by mixing your dry ingredients together....flour, sugar and salt.
Then combine water, oil and butter in a small saucepan...bring to a boil. Let cool just a bit and then add to the flour mixture.
Mix well. Now add the next three ingredients.....eggs, cocoa and vanilla.
Mix well. Add buttermilk and soda....mix thoroughly. I love this step as the batter looks swirly...
The buttermilk makes these brownies oh so moist and rich.
Pour your batter into a jelly roll pan, which is a large cookie sheet with sides.
Bake for 20 minutes or so at 350 degrees. I like to rotate my pan half way through the baking time, just to ensure even baking.This recipe comes with an incredible icing to add over the top, right as the brownies come out of the oven. Sometimes I ice them, sometimes I just sprinkle the top with powdered sugar. This cuts a bunch of calories and is a bit quicker. Today, I just sprinkled with powdered sugar.
oh man, are these good! And speaking of man....my husband just stopped home to grab some tax info and inhaled this one I had cut for the photo~! And, a warning....be careful when you eat them, if you choose the powdered sugar route. My dad always joked and called these suicide brownies....just don't INHALE when you go to take a bit or you choke to death! :-)
BUTTERMILK BROWNIES
2 c flour
2 c sugar
1/4 t salt
Whisk together.
1 c water
1/3 cup oil
1 stick butter
Bring to a boil and add to dry ingredients. Stir well.
Add 2 eggs
3 heaping Tablespoons cocoa
1 t vanilla
Mix well. Add 1/2 cup buttermilk and 1 t soda.
Stir until thoroughly combined. Bake 20 minutes at 350 or until set. Do not overbake. Frost immediately out of the oven with this icing.
Bring 1 stick butter, 3 T milk and 2 T cocoa to a boil. Remove from heat and add 1 t vanilla and 2-2 1/2 cups powdered sugar. Whisk well.
Pour over brownies and cool completely.
Seriously, these are the best brownies I've ever made and they make a huge pan...Great way to make a treat for your family, and then take some to a neighbor or new mom. Boot the box and go for scratch...your family will thank you!
Enjoy!
Stacey
Wednesday, March 7, 2012
Best Banana Bread Ever!
We eat a lot of fruit at our house. I feel like I am constantly buying bananas because we go through them so fast, especially when we choose to eat them in malts, cereal or peanut butter and banana wraps (a kid fave!). So, the other day, I mentioned to Wyatt that he should take a banana in his lunch. He slyly told said "you know what happens if I don't and you have a bunch of bananas that need used...." I guess I'll have to make banana bread. "Sweet"! was his reply! He is my banana bread expert. I have tried several kinds over the years, just to mix it up and I keep coming back to this one. You can tell a good recipe by how the card looks.....
The ink is smeared, who knows what has been dripped on it, it looks a wreck....the sign of a well used recipe I'd say! This recipe came from my mother in law's collection and was written out by my husband to add to our recipe box when we got married. You may notice he spelled 'banana' wrong.....he will be the first to tell you spelling isn't his thing. Ahem....yes.
Its a really simple recipe with a special addition by the Erickson family.
The key to great banana bread is the ripeness of your bananas. The uglier the better. If you think you should throw them out, they are perfect for bread!
Here's mine:
All you do is mix everything together in the order listed. You can bake it in one large loaf pan, but I always have a hard time getting the very center done without the edges being really dark. So I prefer and would recommend mini loaf pans. The recipe makes 4. If they aren't all eaten the first day, which I have NO experience with in this house!----they are great to freeze and pull out to serve with a meal or give as a gift. So....mix it all up, and I sprinkle in a little cinnamon into the batter too, just because I love the flavor it gives the bread. Pour it into your muffin pans...
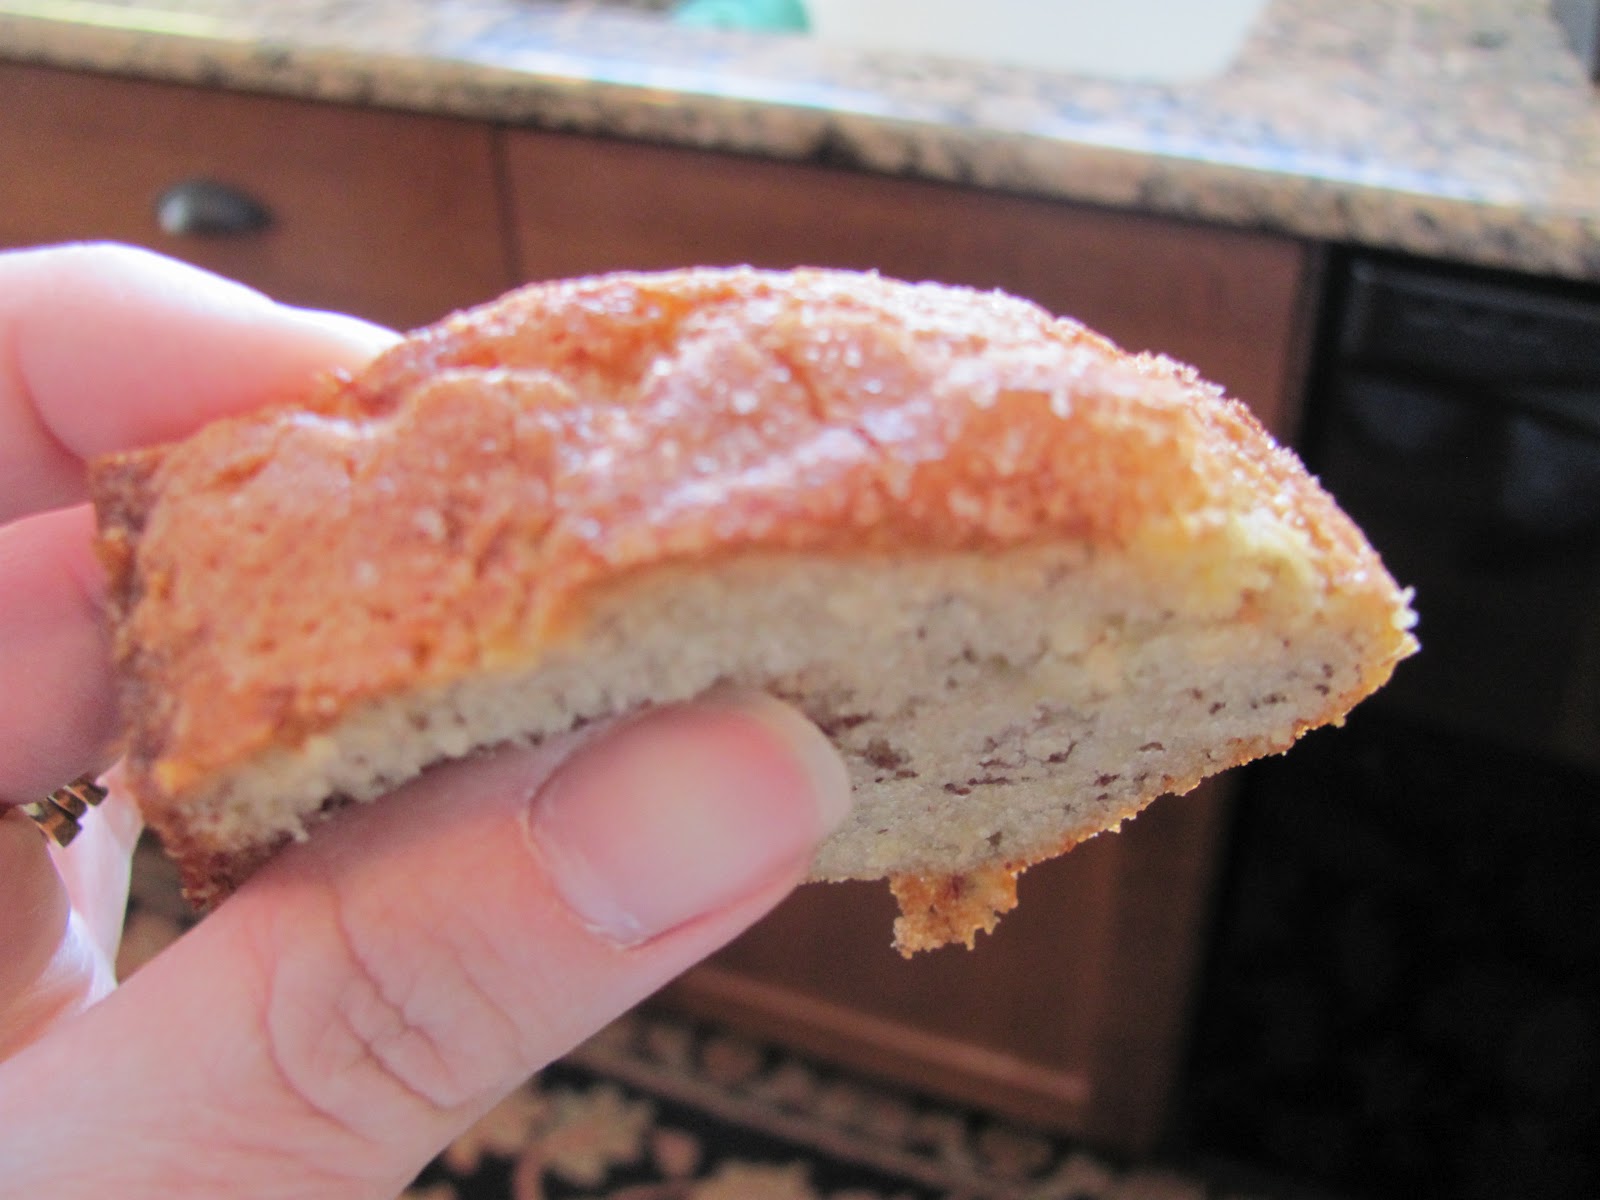
Now, for the secret ingredient. I'm not sure how this came about but I started sprinkling cinnamon and sugar over the top! The family went bezerk....they loved the crunchy sweet top crust. Simple...but adds a lot!
It makes an amazing crust on the top!
The texture of this bread is very light and moist, with great banana flavor. Eat it with a big glass of milk, serve with breakfast, or schmear it with peanut butter for a good combo. You will never have to try anything new, this will be your go to recipe for banana bread as well!
And of course, here is the Budster hoping he can get a taste.....but he knows he won't, he has only had dog food his whole 6 years (or 42 years, depending on how you look at it) of life! You think he would know that by now!
Banana Bread
1 cup sugar
1/2 c softened butter
2 eggs
1/2 cup sour milk (1/2 cup of milk with 2 t. vinegar added. Let it sit 5 minutes before adding)
1 t. soda
2 cups flour
3 mashed bananas
3/4 t. salt
Mix in order and bake at 350.
Let me know how you like it!
Enjoy--
Stacey
The ink is smeared, who knows what has been dripped on it, it looks a wreck....the sign of a well used recipe I'd say! This recipe came from my mother in law's collection and was written out by my husband to add to our recipe box when we got married. You may notice he spelled 'banana' wrong.....he will be the first to tell you spelling isn't his thing. Ahem....yes.
Its a really simple recipe with a special addition by the Erickson family.
The key to great banana bread is the ripeness of your bananas. The uglier the better. If you think you should throw them out, they are perfect for bread!
Here's mine:
All you do is mix everything together in the order listed. You can bake it in one large loaf pan, but I always have a hard time getting the very center done without the edges being really dark. So I prefer and would recommend mini loaf pans. The recipe makes 4. If they aren't all eaten the first day, which I have NO experience with in this house!----they are great to freeze and pull out to serve with a meal or give as a gift. So....mix it all up, and I sprinkle in a little cinnamon into the batter too, just because I love the flavor it gives the bread. Pour it into your muffin pans...
Now, for the secret ingredient. I'm not sure how this came about but I started sprinkling cinnamon and sugar over the top! The family went bezerk....they loved the crunchy sweet top crust. Simple...but adds a lot!
It makes an amazing crust on the top!
The texture of this bread is very light and moist, with great banana flavor. Eat it with a big glass of milk, serve with breakfast, or schmear it with peanut butter for a good combo. You will never have to try anything new, this will be your go to recipe for banana bread as well!
And of course, here is the Budster hoping he can get a taste.....but he knows he won't, he has only had dog food his whole 6 years (or 42 years, depending on how you look at it) of life! You think he would know that by now!
Banana Bread
1 cup sugar
1/2 c softened butter
2 eggs
1/2 cup sour milk (1/2 cup of milk with 2 t. vinegar added. Let it sit 5 minutes before adding)
1 t. soda
2 cups flour
3 mashed bananas
3/4 t. salt
Mix in order and bake at 350.
Let me know how you like it!
Enjoy--
Stacey
Friday, February 24, 2012
J - E - L - L - O !
Watch it wiggle...See it jiggle.....Cool and fruity.....jello, brand gelatin.....This jingle is forever inbedded in by brain for some reason! Good marketing, for sure. Everyone has their favorite jello...and some kind of vivid memory of jello. Whether it is the orange jello with mandarin oranges that your mom used to make for you or the lime jello with shredded carrots (This is just wrong!!) that you used to eat at church potlucks, jello has a place in everyones food diary, wouldn't you agree? This recipe is certain to become your family's favorite. My mother in law gave me this recipe and my kids went nuts over it. I started making it for my own family get togethers, and now MY extended family asks me to bring it to each gathering. It is 7 Layer Jello! It is easy, pretty and always a conversation piece! It really only takes about 7 minutes total to make this, but you can space out those 7 minutes over an entire day due to the chilling time.
So, here we go. You will need 7 different kinds of jello, the small boxes. Any and all kinds work. If you have little ones, they enjoy picking out the different flavors to make the rainbow. Also, you will need boiling water and a large can of evaporated milk.
Get your teakettle going with some boiling water. Arrange your jello boxes in the way you would like them to layer in your 9 by 13 pan, starting with the bottom layer first. Add your jello to a medium bowl and add 1/2 cup boiling water. Stir for a couple minutes until this dissolves. Then add 1/2 cup COLD water. Mix and pour into your 9 by 13 pan.
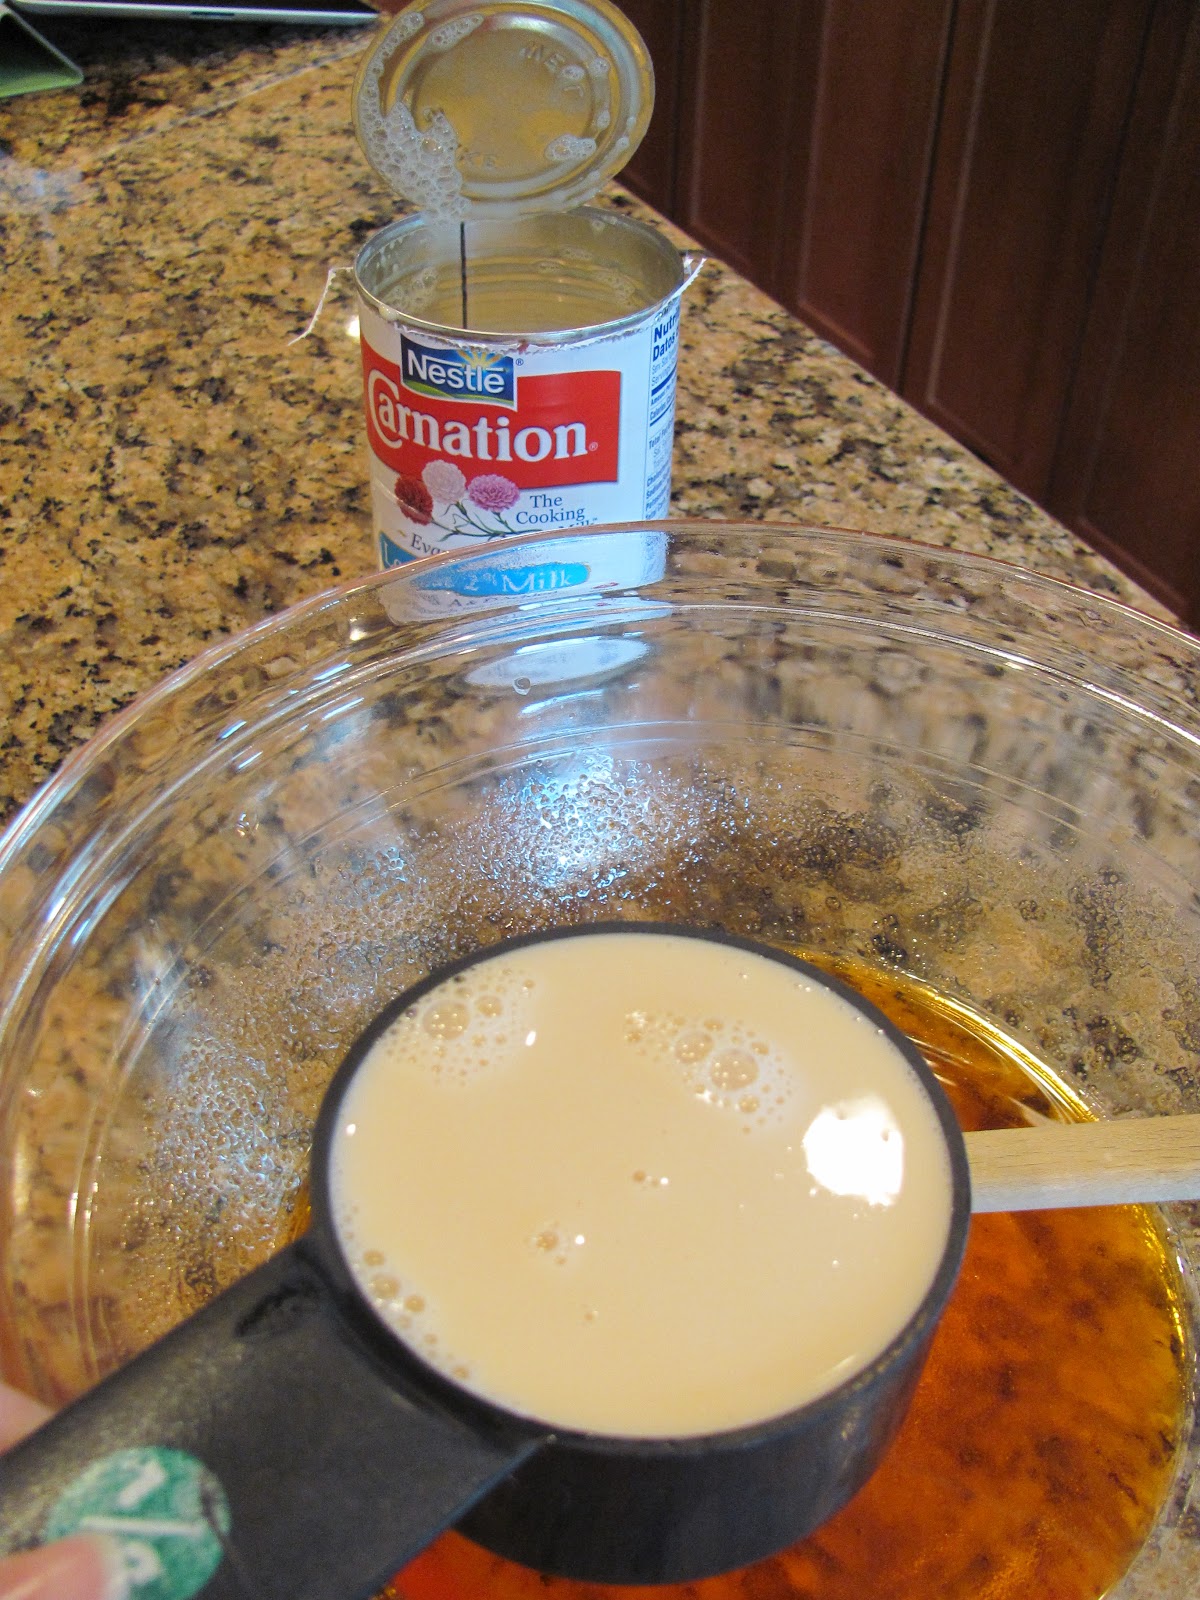
It will make a very thin layer on the entire bottom of the pan. Put in the fridge to chill. It will chill fairly quickly, since it is a thin layer and each of the following layers will chill even quicker. Rinse our your bowl and spatula, but leave it on the counter as you will be going back to it over and over throughout the day. Go throw in a load of laundry, read a couple chapters or run an errand. Whenever you think of it next, start the teakettle again. Pick your next color of jello and again add 1/2 cup boiling water and stir to dissolve. This time, instead of adding cold water, add 1/2 cup EVAPORATED MILK.
Stir to combine and pour over the completely chilled and firm first layer.
Put it back in the fridge, rinse your bowl and do whatever is next on your to do list.
The Budster....enjoying a relaxing morning......
Now you just continue repeating this process, dissolve with boiling water and alternating each layer between cold water or the evaporated milk. You should begin and end with the hot water/cold water layer, making sure to chill completely between each layer.
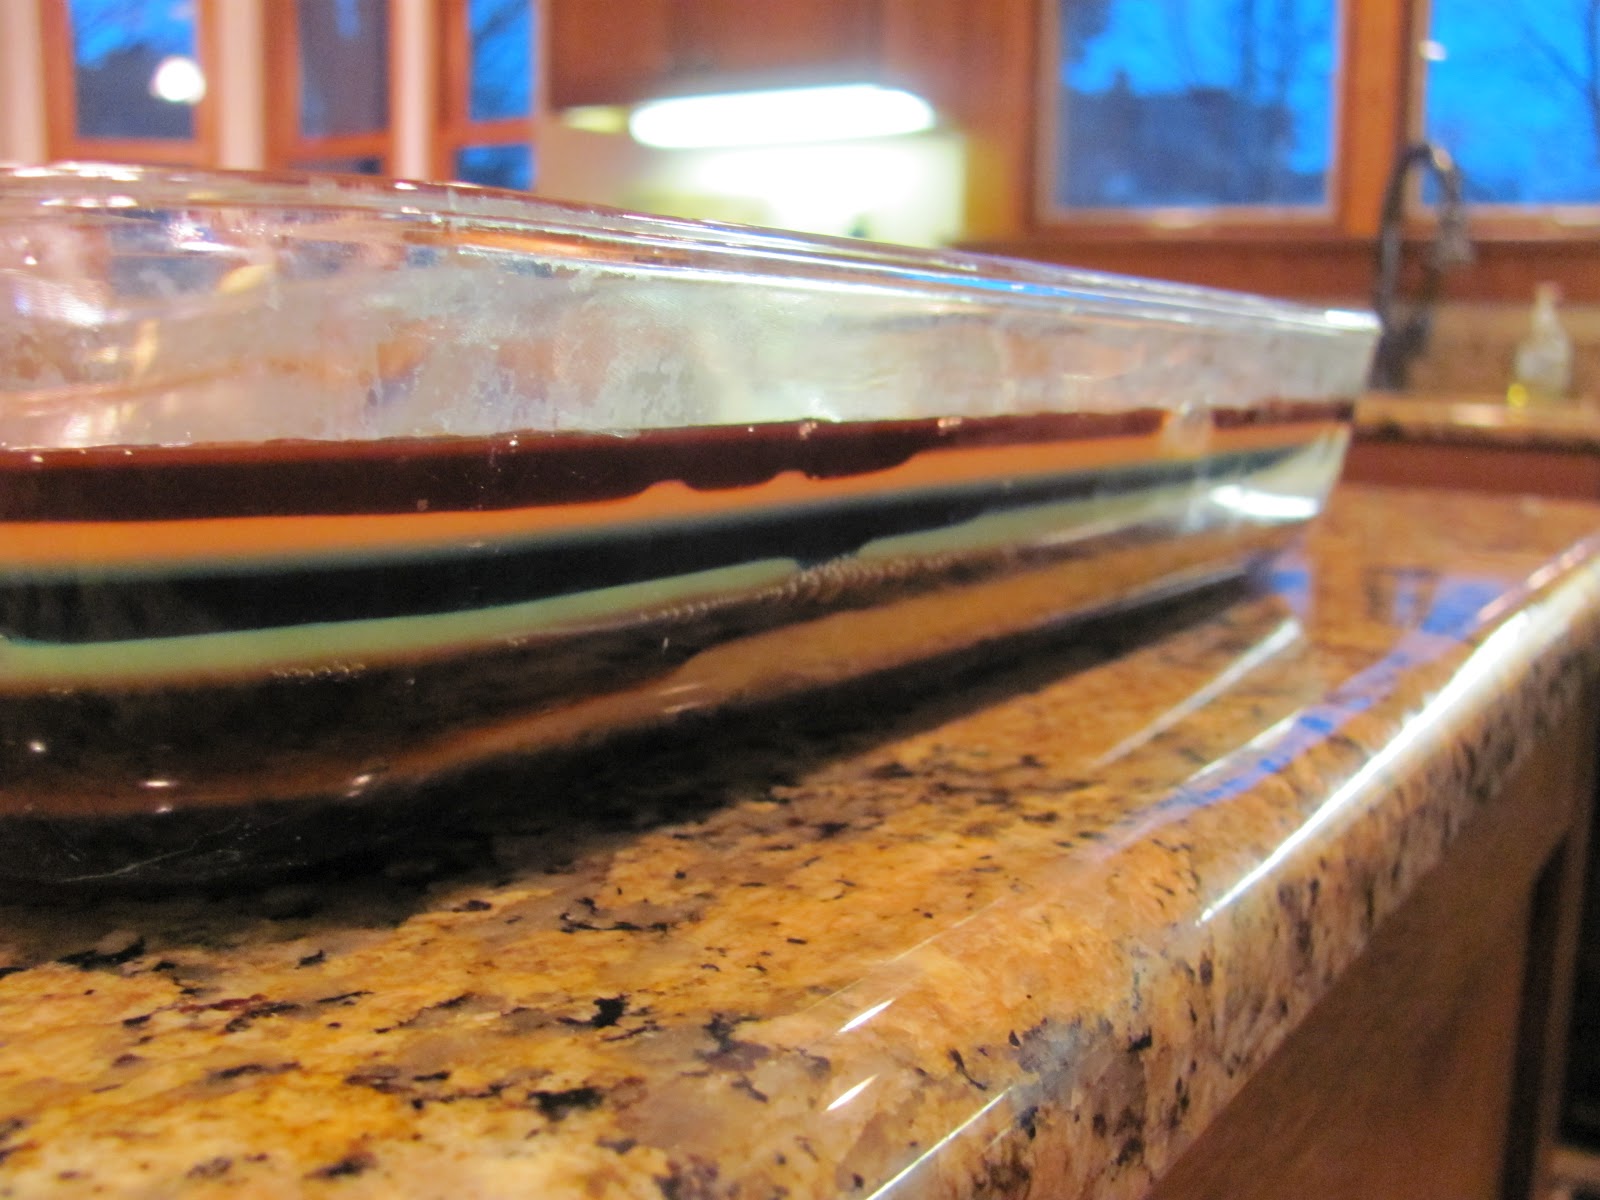
When all layers are in the pan, it will look like this!
And when you cut into it, like this!
Isn't it lovely? It tastes so creamy and sweet and it seem to fascinate people of how you would ever make it! Now you know! Make this for your family and watch their smiles.....it will become your family favorite too!
Enjoy---
Stacey
So, here we go. You will need 7 different kinds of jello, the small boxes. Any and all kinds work. If you have little ones, they enjoy picking out the different flavors to make the rainbow. Also, you will need boiling water and a large can of evaporated milk.
Get your teakettle going with some boiling water. Arrange your jello boxes in the way you would like them to layer in your 9 by 13 pan, starting with the bottom layer first. Add your jello to a medium bowl and add 1/2 cup boiling water. Stir for a couple minutes until this dissolves. Then add 1/2 cup COLD water. Mix and pour into your 9 by 13 pan.
It will make a very thin layer on the entire bottom of the pan. Put in the fridge to chill. It will chill fairly quickly, since it is a thin layer and each of the following layers will chill even quicker. Rinse our your bowl and spatula, but leave it on the counter as you will be going back to it over and over throughout the day. Go throw in a load of laundry, read a couple chapters or run an errand. Whenever you think of it next, start the teakettle again. Pick your next color of jello and again add 1/2 cup boiling water and stir to dissolve. This time, instead of adding cold water, add 1/2 cup EVAPORATED MILK.
Stir to combine and pour over the completely chilled and firm first layer.
Put it back in the fridge, rinse your bowl and do whatever is next on your to do list.
The Budster....enjoying a relaxing morning......
Now you just continue repeating this process, dissolve with boiling water and alternating each layer between cold water or the evaporated milk. You should begin and end with the hot water/cold water layer, making sure to chill completely between each layer.
When all layers are in the pan, it will look like this!
And when you cut into it, like this!
Isn't it lovely? It tastes so creamy and sweet and it seem to fascinate people of how you would ever make it! Now you know! Make this for your family and watch their smiles.....it will become your family favorite too!
Enjoy---
Stacey
Wednesday, February 8, 2012
Chicken Piccata
I have always wanted to try this recipe and tonight was the night! Chicken, lemon, garlic....yum! And good for you too! I've been trying to incorporate some new things into the kids' meals...to see if they like it so tonight it was capers. I could not contain my laughter when all three kids said "are these peas?" Um, kind of?!?
This recipe is an easy one, few ingredients and lots of flavor.
Here's the ingredients...
OK, the first thing is to pound out the chicken breasts until they are about 1/2 inch thick. Anyone who knows me, knows that I HATE raw meat of any kind. Working with it literally makes me sick...in fact, my older two kids are my go-to's when meatballs are on the menu! I made it through this meal prep ok, but I touch the chicken as little as possible. Put a few pieces into a large plastic bag. Now is the time that you can take out all your days stress on the poor little pieces of chix! Pound away with a meat mallet, frying pan or even a rolling pin works.
Then when they are pounded out they look like this:
Nice and flat and they will cook quicker and more evenly.
Dredge chicken in flour, which means just put some flour in a pie plate and slap the chicken in there, wiggle it around and then flip it over and do the other side. Shake any extra off.
Add to frying pan.
While that cooks, you can get the rest of your ingredients ready to go. Garlic, lemon, capers, chicken broth and butter.
I just love lemons. The smell. The feel. The look. They make me happy.
Isn't it cheerful?
Brown your chicken on both sides, letting it get nice and golden before you flip it. You may have to cook it in batches, depending on how many pieces you are making. Keep it warm a low oven while you make the sauce. Drain off most of the extra oil and add your garlic. Sautee until flavors release and then add chicken broth. Get all of those yummy bits of flavor off of the bottom of your pan with your spoon. Add lemon slices and bring to a boil. Simmer 5 minutes.
Add your lemon juice and capers..simmer 5 minutes more. Smellin good now! Teh sauce will thicken slightly, then you add your butter for the richness you SO deserve. Voila! Sauce is done. Pour over your chicken pieces and serve.
It's what is for dinner tonight at the Erickson's! So as we were eating, the kids were having a contest to see who could arrange their plate for the neatest picture to put in the blog. Wyatt took the honors tonight...here you go:
It got a thumbs up from everyone...it is flavorful and refreshing with the lemon in there and rich with the butter and garlic. I may add a bit less lemon juice next time as I found it a little tart.
Oh, and one more thing....here is my cute dog, Buddy. He sits here in this doorway every night while I make dinner. Isn't he adorable? I think he must think if he sits real nice and looks cute I may sneak him some table food. It will never happen, but he sure makes me smile to see him there!
Chicken Piccata
(adapted from allrecipes.com)
3 large chicken breast, boneless cut into smaller pieces
salt and pepper to taste
1/2 cup flour
2 T. vegetable oil
1 clove garlic, minced
1 cup chicken broth
1/2 lemon,thinly sliced
1/4 cup fresh lemon juice
2 T. capers, drained and rinsed
3 T. butter
1. Preheat oven to 200 degrees. Place a serving platter into the oven to warm.
2. Season the chicken pieces with salt and pepper and dredge them in flour. Shake off excess flour. Heat the oil in a skillet, pan fry the chicken pieces until golden brown on both sides, about 4 minutes per side. Work in batches and do not crowd skilllet, adding oil as needed. Place the chicken into the warmed platter in oven. When finished with all of the chicken, drain most of the oil from the skillet, leaving a thin coatin on the surface of the pan.
3. Cook and stir the minced garlic in the skillet about 20 seconds. Pour in chicken broth. Scrape and dissolve any brown bits from the bottom of the pan. Stir in the lemon slices and bring the mixture to a boil. Let cook, stirring occasionally, until the sauce reduces to about 2/3 cup, 5 to 8 minutes. Add the lemon juice and capers: simmer unitl the sauce is reduced and slightly thickened, about 5 minutes more. Drop the butter into the skillet and swirl it into the sacue by tilting the skillet until the butter is melted and incorporated.
4. Arrange the chicken on serving plates and spoon sauce over top to serve.
There you have it----a thumbs up option for dinner. Family approved. Buddy approved.
Enjoy--
Stacey
This recipe is an easy one, few ingredients and lots of flavor.
Here's the ingredients...
OK, the first thing is to pound out the chicken breasts until they are about 1/2 inch thick. Anyone who knows me, knows that I HATE raw meat of any kind. Working with it literally makes me sick...in fact, my older two kids are my go-to's when meatballs are on the menu! I made it through this meal prep ok, but I touch the chicken as little as possible. Put a few pieces into a large plastic bag. Now is the time that you can take out all your days stress on the poor little pieces of chix! Pound away with a meat mallet, frying pan or even a rolling pin works.
Then when they are pounded out they look like this:
Nice and flat and they will cook quicker and more evenly.
Dredge chicken in flour, which means just put some flour in a pie plate and slap the chicken in there, wiggle it around and then flip it over and do the other side. Shake any extra off.
Add to frying pan.
While that cooks, you can get the rest of your ingredients ready to go. Garlic, lemon, capers, chicken broth and butter.
I just love lemons. The smell. The feel. The look. They make me happy.
Isn't it cheerful?
Brown your chicken on both sides, letting it get nice and golden before you flip it. You may have to cook it in batches, depending on how many pieces you are making. Keep it warm a low oven while you make the sauce. Drain off most of the extra oil and add your garlic. Sautee until flavors release and then add chicken broth. Get all of those yummy bits of flavor off of the bottom of your pan with your spoon. Add lemon slices and bring to a boil. Simmer 5 minutes.
Add your lemon juice and capers..simmer 5 minutes more. Smellin good now! Teh sauce will thicken slightly, then you add your butter for the richness you SO deserve. Voila! Sauce is done. Pour over your chicken pieces and serve.
It's what is for dinner tonight at the Erickson's! So as we were eating, the kids were having a contest to see who could arrange their plate for the neatest picture to put in the blog. Wyatt took the honors tonight...here you go:
It got a thumbs up from everyone...it is flavorful and refreshing with the lemon in there and rich with the butter and garlic. I may add a bit less lemon juice next time as I found it a little tart.
Oh, and one more thing....here is my cute dog, Buddy. He sits here in this doorway every night while I make dinner. Isn't he adorable? I think he must think if he sits real nice and looks cute I may sneak him some table food. It will never happen, but he sure makes me smile to see him there!
Chicken Piccata
(adapted from allrecipes.com)
3 large chicken breast, boneless cut into smaller pieces
salt and pepper to taste
1/2 cup flour
2 T. vegetable oil
1 clove garlic, minced
1 cup chicken broth
1/2 lemon,thinly sliced
1/4 cup fresh lemon juice
2 T. capers, drained and rinsed
3 T. butter
1. Preheat oven to 200 degrees. Place a serving platter into the oven to warm.
2. Season the chicken pieces with salt and pepper and dredge them in flour. Shake off excess flour. Heat the oil in a skillet, pan fry the chicken pieces until golden brown on both sides, about 4 minutes per side. Work in batches and do not crowd skilllet, adding oil as needed. Place the chicken into the warmed platter in oven. When finished with all of the chicken, drain most of the oil from the skillet, leaving a thin coatin on the surface of the pan.
3. Cook and stir the minced garlic in the skillet about 20 seconds. Pour in chicken broth. Scrape and dissolve any brown bits from the bottom of the pan. Stir in the lemon slices and bring the mixture to a boil. Let cook, stirring occasionally, until the sauce reduces to about 2/3 cup, 5 to 8 minutes. Add the lemon juice and capers: simmer unitl the sauce is reduced and slightly thickened, about 5 minutes more. Drop the butter into the skillet and swirl it into the sacue by tilting the skillet until the butter is melted and incorporated.
4. Arrange the chicken on serving plates and spoon sauce over top to serve.
There you have it----a thumbs up option for dinner. Family approved. Buddy approved.
Enjoy--
Stacey
Subscribe to:
Posts (Atom)